Microservices architecture offers flexibility, scalability, and ease of deployment and has gained popularity and is a must-have skill for DevOps Engineers. In this blog, we will explore how to create two microservices: Service1 and Service2, using Docker, and push their images to Amazon Elastic Container Registry (ECR). We’ll also set up nginx as a reverse proxy to demonstrate inter-service communication.
What is Amazon ECR?
It is a fully managed regional container registry service by AWS that offers great hosting and deployment of images to ECS, EKS, or even on-premises. We can simply create a docker image and push it into Amazon ECR where it compresses, encrypts, and manages access and we can version, tag and manage image lifecycle policies too.
Why Amazon ECR?
First of all, it is Free for 500MB of private repository storage per month for the first year with AWS FREE Tier. For pricing, let’s view the Amazon ECR pricing page for more details. The major reason why i encourage to use this service is, that we do not need to manage separate infrastructure for storing our container registry. It uses Amazon S3 for high availability and accessibility. Also, we can transfer our images through HTTPS and automatic encryption makes it more secure. Further, we can easily integrate with ECS, EKS which helps to simplify our developement workflow.
Now let’s dive into our workflow. Simply follow these steps:
Step 1: Setting Up Environment
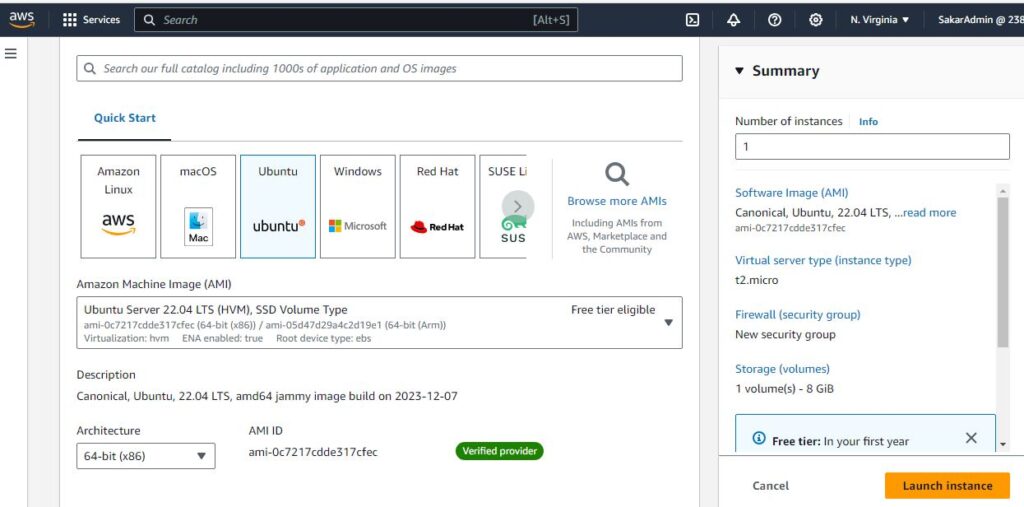
1.1 Launch an Ubuntu EC2 Instance
- Navigate to AWS EC2 dashboard
- Launch a new Ubuntu instance
1.2 Connect to the instance
- Use EC2 Instance connect to establish a secure connection to the instance.
Step 2: Install Docker in Ubuntu EC2 instance
sudo apt-get update
sudo apt install docker.io
sudo usermod -aG docker $USER
sudo reboot
Step 3: Create Project Structure
mkdir Microservices
cd Microservices
mkdir Service1
mkdir Service2
Step 4: Create “Dockerfile” and Files for Service1
4.1 Create Dockerfile for Service1 <vi Dockerfile>
FROM nginx:alpine3.18
COPY index.html /usr/share/nginx/html
COPY nginx.conf /etc/nginx/conf.d/default.conf
EXPOSE 80
4.2 Create index.html for Service1 <vi index.html>
<!DOCTYPE html>
<html lang="en">
<head>
<meta charset="UTF-8">
<meta name="viewport" content="width=device-width, initial-scale=1.0">
<title>Hello from Service 1</title>
</head>
<body>
<h1>Hello from Service 1</h1>
</body>
</html>
4.3 Create nginx.conf for Service1 <vi nginx.conf>
server {
    listen 80;
    server_name _;

    index index.htm index.html;
    root /usr/share/nginx/html;

    location / {
        try_files $uri $uri/ /index.html =404;
    }

    location /api {
        proxy_pass http://service2-80-tcp.microservices:80;
        proxy_http_version 1.1;
    }
}
Step 5: Build Service1 Docker Image
cd Service1
docker build -t service1 .
Step 6: Repeat Steps 4-5 for Service2
Now, simply repeat the steps of 4 and 5 for Service2 replacing the “service1” with “service2” wherever applicable. And also while creating the “nginx.conf” file location /api is not required if we want service1 as client only (i have commented as it is not required which is shown below:)
6.1 Create nginx.conf for Service2 <vi nginx.conf>
server {
    listen 80;
    server_name _;
    index index.htm index.html;
    root /usr/share/nginx/html;

    location / {
       	try_files $uri $uri/ /index.html= 404;
    }

#    location /api {
#        proxy_pass http://container-1-80-tcp.cluster1:80;
#        proxy_http_version 1.1;
#    }
}
Step 7: Install AWS CLI and Configure
sudo apt install awscli
aws configure
# Enter Access Key ID, Secret Access Key, Default region name (e.g., us-east-1)
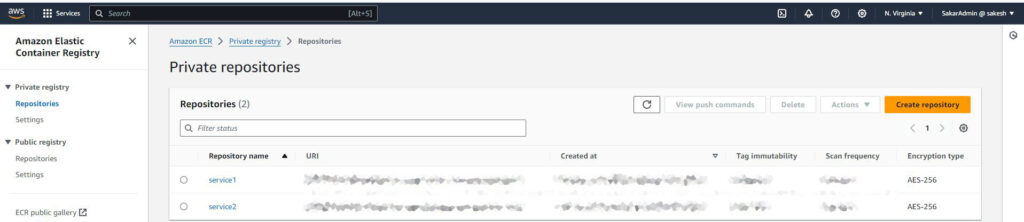
Step 8: Create ECR Repositories
aws ecr create-repository --repository-name service1 --region us-east-1Step 9: Log in into AWS ECR
aws ecr get-login-password --region us-east-1 | docker login -u AWS --password-stdin <ECR_REPO_URI>Step 10: Tag and Push Images to Elastic Container Registry (ECR)
docker tag service1 <ECR_REPO_URI>/service1
docker push <ECR_REPO_URI>/service1
Likewise, create a repository for “service2” and push the service2 image too to ECR.
In this step-by-step guide, we learned how to build microservices using Docker, configure nginx as a reverse proxy, and push Docker images to AWS ECR. This approach enables easy deployment and scalability of microservices in a cloud environment. In upcoming blog, i will share about how to deploy these images in ECR to Amazon Elastic Container Service (ECS). Therefore, stay tuned for updates in next blog.
Feel free to reach out with me with any questions or feedback. Happy learning!
Leave a Reply