Hello guys, today we are going to learn how to deploy container images from Amazon Elastic Container Registry (ECR) to Amazon Elastic Container Service (ECS). It is very important to learn the concepts of containerization for DevOps Engineers and system administrators, but first let’s see start from the basic concepts.
What is Amazon ECS?
As the name suggests, Amazon ECS is elastic container service or container orchestration service on AWS that fits organization of all sizes. Either we are deploying containers on EC2 instances or leverage the serverless AWS Fargate, ECS simplifies all the process of deploying and managing the containerized applications. The Service Connect, Service Discovery feature while launching the ECS service to connect two or more containers at desired port along with monitoring the logs and events from CloudWatch gives us instant idea of what’s happening and debug the error, if some mistake in the process occurs.
We can define the container properties metrics like CPU, memory, networking and IAM policies, without working about server provisioning or scaling the cluster. Further the familiar features like security groups, load balancing, EBS volumes and IAM roles, we have full control over how to run an application on container.
Why Amazon ECS?
The serverless compute abilities of AWS Fargate helps to quickly deploy the applications while we don’t need to worry about infrastructure while launching the containers at scale in AWS. All these services at top-notch security meeting regulatory standards in a pay as you go model helps to optimize our cost of application deployment. More details on pricing can be viewed here.
Now, without wasting much time, with high energy, let’s delve into the process of deploying containers from Amazon ECR to Amazon ECS, exploring each step-in detail as follows:
Step 1: Navigate to Amazon ECS
To begin, access the Amazon ECS console within the AWS Management Console.
Step 2: Create Task Definition
– Task Definition Family: “service1”
– Check: AWS Fargate
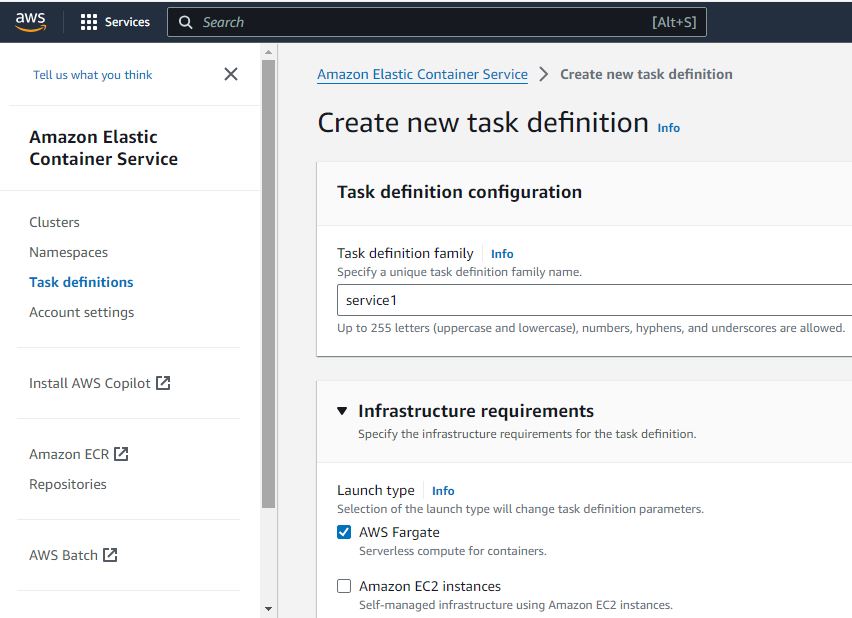
– Select minimum CPU and memory (.25 vCPU and .5GB Memory) – Select `ecsTaskExecutionRole` from Task Role dropdown

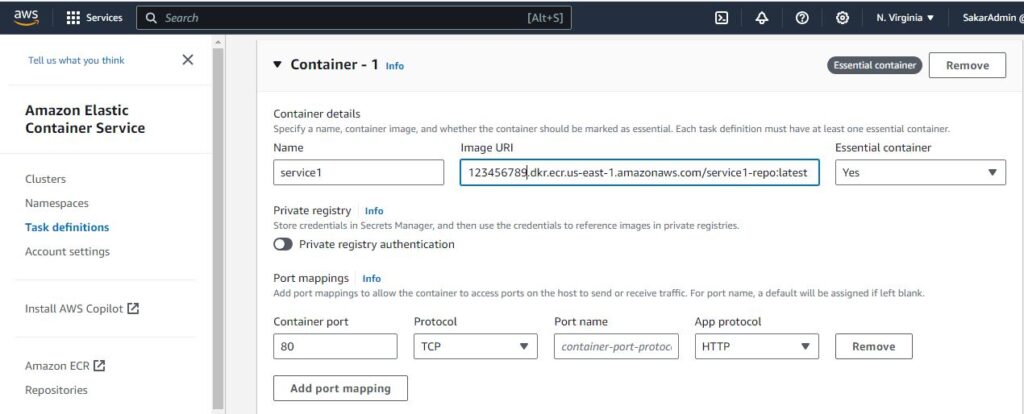
In Container-1:
– Name: “service1”
– Copy service1 Image URI from ECR (e.g., 2381123456.dkr.ecr.us-east-1.amazonaws.com/service1:latest)
– Container Port: 80
– Protocol: TCP
– Leave Port-name as it is
– App Protocol: HTTP
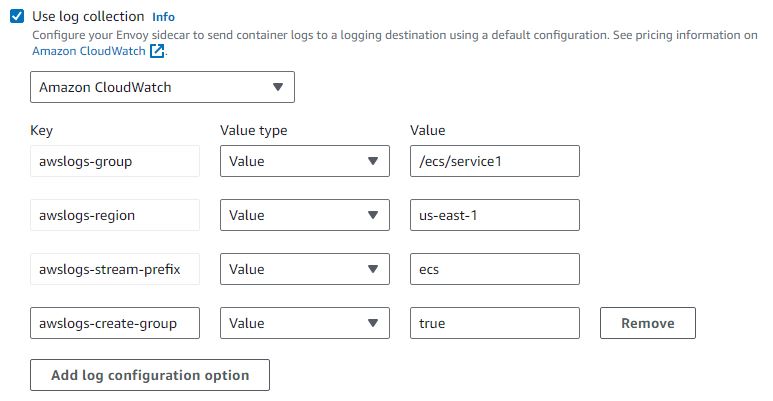
– Ensure “Use Log collection” is checked
– Click on Create
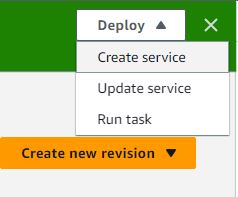
Step 3: Create Service 1
– First, select create service on deploy drop-down menu
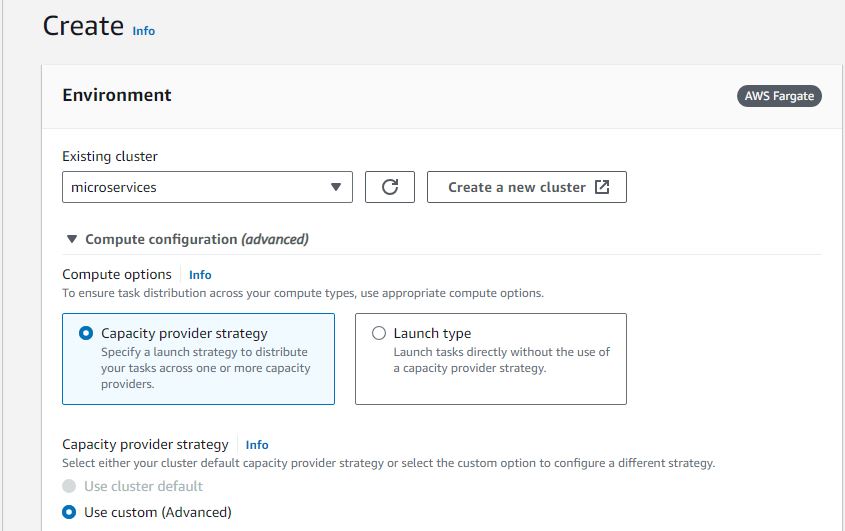
– Create a cluster by navigating to “Create New Cluster” and give it the name “microservices”Select “microservices” from the existing cluster dropdown
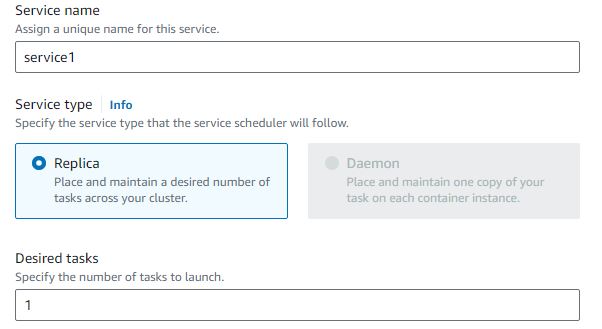
– Service Name: “service1”
– Desired Tasks: 1
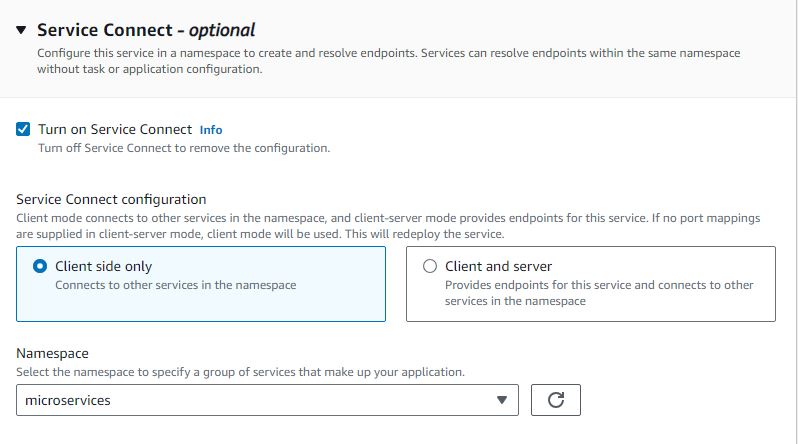
– Select “Service Connect” and turn it on
– Select “Client Side Only”
– Select “microservices” in Namespace dropdown
– Check “Use log collection”
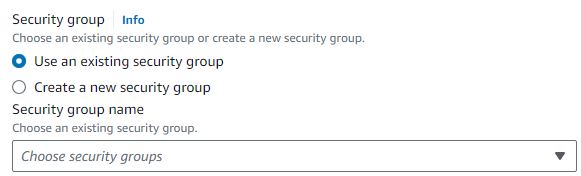
– In the networking section, select the VPC and Security Group
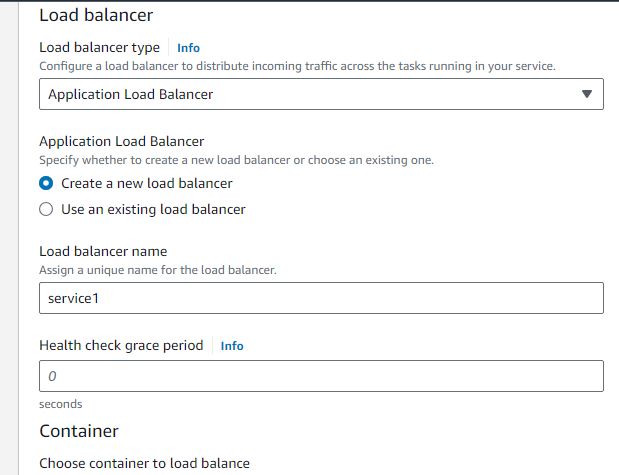
– In load balancing section, create a new load balancer with name “service1” and leave other settings as default
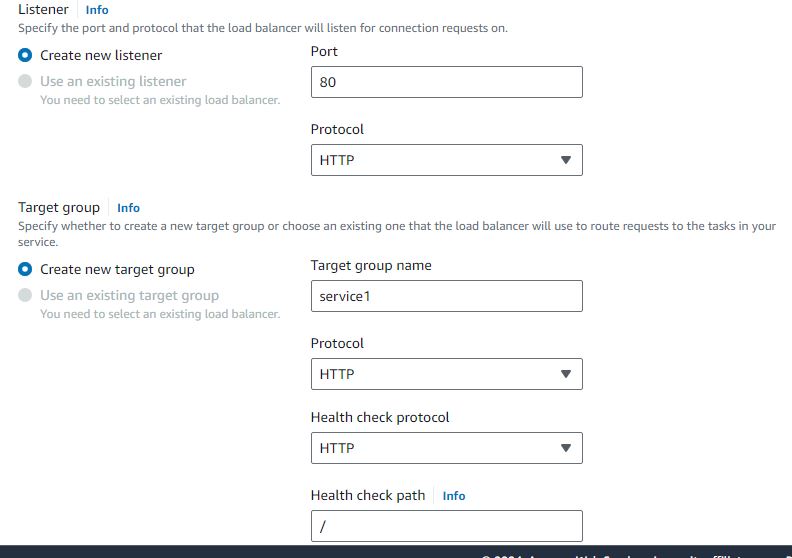
– Create a new listener and target group with name “service1”
Step 4: Repeat the similar steps and create Task Definition for service2
– Task Definition Family: “service2”
– Select minimum CPU and memory
– Select the task role
In Container-1:
– Name: “service2”
– Copy the Image URI from ECR
– Select container port 80 on port mappings
– Ensure “Use log collection” is checked
– Click on Create
Step 5: Create Service 2
– Select “Create Service” on deploy dropdown after creating the task definition
– Select the “microservices” cluster
– Select FARGATE launch type
– Application type service
– Service Name: “service2”
– Desired Tasks: 1
– Click on “Service Connect” and turn it on
– Select client and server
– Namespace: “microservices”
– Add port mapping settings
– Select “service2-80-tcp” as port alias and give 80 to port number
– Ensure log collection is checked
– Select the security group, VPC
– In load balancing section, select existing load balancer and target group
– Leave other settings as default
Now, when accessing the DNS name of service1, it should show “hello from service1”. Upon refreshing the page, it should display “hello from service2” due to load balancing settings. Additionally, accessing the DNS name of service1/api should show “hello from service2” due to nginx reverse proxy settings.


In conclusion, deploying containers from Amazon ECR to Amazon ECS involves a series of steps including task definition creation, service setup, and load balancing configuration. By following these steps, developers can effectively manage and scale containerized applications on AWS.
Leave a Reply